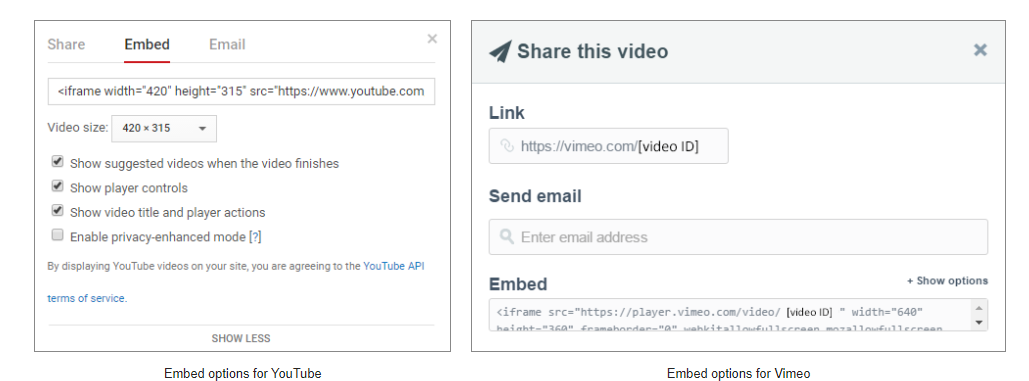
Video embed example


The HTML5 video player has most of the same options as the HTML5 audio player. The first attribute to consider, preload, is likely even more important when it comes to videos than with audio. As video files are often a combination of moving imagery and an audio track, their file size can bloat much faster. We need to remember that many website viewers today are browsing on their mobile devices. This can mean both slower connections and their data burning up to run a video.
The decision comes down to how important the video is to the page, and how efficiently you'd like the page to run. If a video's preload is set to auto, it will download most of the data, which may slow the page's loading time, yet the video will be ready once the user decides to start it. But on the other hand, a preloading setting of metadata or none will only dig into the user's data or loading time if they choose to watch the video.
| Preload Values | |
| auto |
|
| metadata | Only kilobytes-worth of the file will download just to give the user some basic information such as the file's time length. |
| none |
|
The remaining attributes below determine other behaviors or features of the video player. They are also each Boolean values, meaning if they are applied, that feature is turned on. They do not need to be set equal to a value like normal attributes, because they're either there, or they're not—on or off.
| Boolean Attributes | |
| autoplay |
|
| controls |
|
| loop | The video will start over again once it reaches the end. |
| muted | This indicates that the video will initially be set to mute. |
What are the pros and cons of the most common web video formats?
Some web designers favor formats that are open-source as they are free to the community to be viewed, used and even enhanced. But the most common issue with open-source work is that it isn't always widely supported. But with the HTML5 "video" tag's stacking capability, you can include multiple file types to try and obtain your preferred file type while still maintaining your video's compatibility. All of the file types we will be using are lossy file types. They all have undergone some degree of quality compression as original file quality settings would be far too high for web use. For that matter, sometimes even compressed videos can be a difficult balancing act between file size and quality. This issue will be discussed more on the following page. But first, review the table below. These are the most common video file extensions for the web, and their type attribute values to use in the "source" tag.
| File | Ext | Type | Description |
| MPEG-4 | .mp4 | type="video/mpeg" |
|
| Ogg Theora | .ogg | type="video/ogg" |
|
| Web Media | .webm | type="video/webm" |
|
Video Quality
When it comes to video, you need to account for settings for the visuals and any audio that may be included. Trying to decide how high the quality should be for your video depends on several factors. How large do you want it to display? Is it something scenic that you want to be as clear as possible? Is there a lot of visual action going on? Is there an audio track, and if so, how complex is it? Ultimately, you want the best looking video you can manage while still being reasonable with your file size. So as you answer the questions above, you'll find yourself making adjustments to the quality settings for your video's display size, bitrate, frame rate, and audio settings. Click through the slideshow below to get a better idea of what each setting entails.
Share and Embed
Video streaming services use a different embedding technique, but it can be a much simpler solution.
Websites like YouTube and Vimeo have increased in popularity for hosting and viewing videos. A large part of
their appeal is that they take the frustrating work of preparing and compressing videos for the web off your
hands. You upload a video, and they do the rest. And conveniently, you can embed videos you've uploaded to one
of these services onto your own web page. However, they do not use an HTML5 video method, but rather something
called an "iframe".
The "iframe" tag creates an element that contains content from another document, which includes PDFs and other
websites. These video services automatically generate code for you to add to your website when you click options
on the video's page labeled as "Share" and "Embed". Clicking these selections will reveal the code that you need
to copy and paste and you're done.

There are advantages and disadvantages to each approach. If you host your own video, you have more control over the content, but it will really eat up your bandwidth and file space. If you use a free service like YouTube or Vimeo, it's much easier for you and your website, but then you may need to deal with slower loading speeds and advertisements being added before your video. If a designer's website is for a business, a paid video hosting service may be the best bet. They offer better bandwidth, file space, quality and no ads. Otherwise, free services are most likely the most convenient and attainable option.
Video Embed
Homepage